Add a user
The Users page lets you add a new user.
About this task
When you add a new user, you will typically select Local or SAML as the source. You can choose to select a user from the Active Directory or from LDAP, but you must first make sure that the user exists in the Active Directory or in LDAP. Therefore, in these cases, we recommend that you import these users directly from the Active Directory or from LDAP.
Procedure
-
In the top navigation bar, select
 The administration page opens.
 -
In the Settings section, select
Users.
The Users management page opens.
-
In the top right section, select Users.
The Users page opens.
-
In the top right section, select +Add.
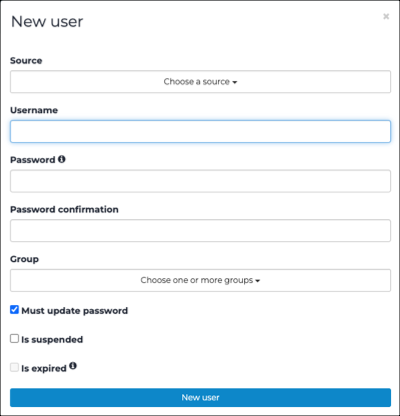
A dialog shows.
-
From the Source dropdown, select a source for the
user.
- Local
- Active Directory
- LDAP
- SAML
Note:The dialog might change after you make your selection. - In the Username field, enter a value.
-
In the Password field, enter a password.
Note:This step is not applicable if you chose SAML as the source.
-
In the Password confirmation field, enter the password
again.
Note:This step is not applicable if you chose SAML as the source.
- From the Group dropdown, select a group for the user.
- Optional:
If necessary, select Must update password. This is
selected by default.
Note:When this is selected, the user will be prompted to update their password the next time they log in.
- Optional:
If necessary, select Is suspended.
Note:When this is selected, the user will not be able to log in.
- Optional:
If necessary, select Is expired.
Note:When this is selected, the user is forced to change their password the first time that they log in after the expiration date.
- Select New user.