Add a local group
The Groups page lets you add new user groups.
Procedure
-
In the top navigation bar, select
 The administration page opens.
 -
In the Settings section, select
Users.
The Users management page opens.
-
In the top right section, select Groups.
The Groups page opens.
-
In the top right section, select +Add.
A dialog shows.
-
In the top left, select General.
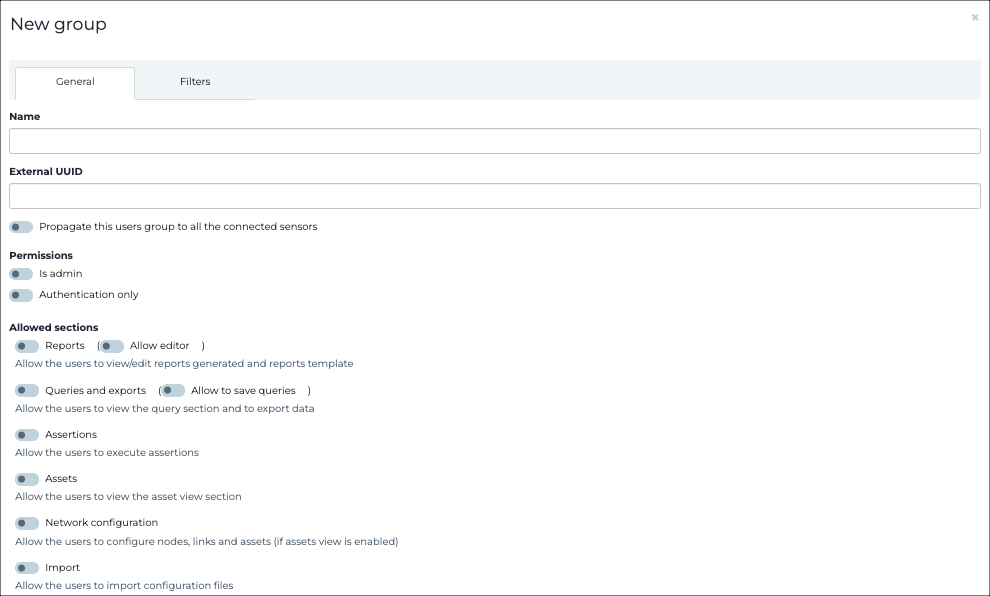
- In the Name field, enter a name for the group.
- Optional:
If necessary, in the External UUID field, enter a
universally unique identifier (UUID).
Note:This is useful should the user group be created through security assertion markup language (SAML) integration and the external identity provider (IdP) uses an identifier (ID) rather than a human-readable group name.
- If you want the group to propagate to connected sensors, select Propagate this users group to all the connected sensors.
-
If the group belongs to a predefined type, select the appropriate one:
- Is admin
- Authentication only
-
If you do not select a predefined group type, continue with the steps below to
manually select section(s) that the group can view and interact with.
- Select New group.