Configure Fortinet FortiGate
Configure Guardian firewall integration with the Fortinet FortiGate firewall.
Before you begin
- You have administrator privileges
- You have generated the REST application programming interface (API) access token from the firewall admin Web user interface (UI)
- You have added the Guardian address subnet to trusted hostsNote:The access token needs to have permission to insert, read, and delete entities such as:
- Addresses
- Addrgroups
- Routes
- Sessions
- Policies
About this task
Guardian integration supports FortiOS versions 6.2, 6.4, 7.0, 7.2, and 7.4.9. This integration uses the REST API.
Procedure
-
In the top navigation bar, select
 The administration page opens.
 -
In the Settings section, select Firewall
integration.
The Firewall integration page opens.
-
In the top right section, select +
A dialog shows.
-
From the Choose firewall dropdown, select
Fortinet FortiGate.
A dialog shows.
-
If it is not populated already, in the Host (CA-Emitted TLS
Certificate) field, enter the host internet protocol (IP) address.
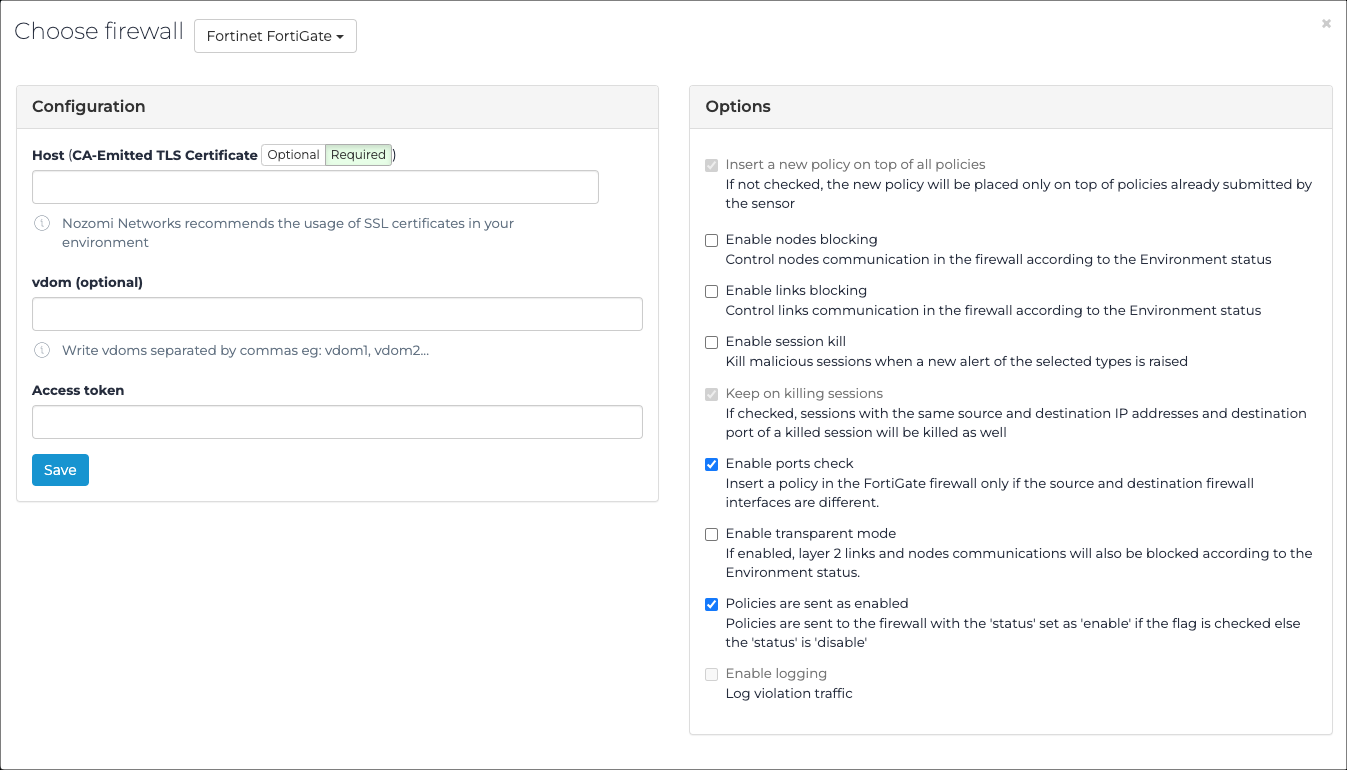
- Optional: In the vdom (optional) field, enter one or more Virtual DOM (vdom)s. Use a comma to separate multiple entries.
- In the Access token field, enter the access token.
- Optional:
If necessary, in the Options section, select one or more
of these options:
- Select Insert a new policy on top of all policies.
- Select Enable nodes blocking.
- Select Enable links blocking.
- Select Enable session kill. Then select the specific alert type(s).
- Select Keep on selecting sessions.
- Select Enable ports check.
- Select Enable transparent mode.
- Select Policies are sent as enabled.
- Select Save.