Configure Check Point R81.20
Configure Guardian firewall integration with the Check Point R81.20 firewall.
Before you begin
- Administrator privileges
- A valid username and password for authentication
- Access to the Check Point R81.20 management host
- The name of the gateway where the rules will be installed
About this task
- Creates a Check Point R81.20 layer (Nozomi layer) containing the rules
- Adds the rules to block links and nodes that are unlearnedNote:If a node or link changes its status to learned, the corresponding rule will be removed.
- Creates a session named Nozomi Guardian in the firewall to manage rule insertion and removal
- Generates Check Point R81.20 Service objects for link ports that are not already mapped in the firewall
- Creates host objects to be used in the block link and nodes rules
Procedure
-
In the top navigation bar, select
 The administration page opens.
 -
In the Settings section, select Firewall
integration.
The Firewall integration page opens.
-
In the top right section, select +
A dialog shows.
-
From the Choose firewall dropdown, select
Check Point R81.20.
A dialog shows.
-
If it is not populated already, in the Host (CA-Emitted TLS
Certificate) field, enter the host internet protocol (IP) address.
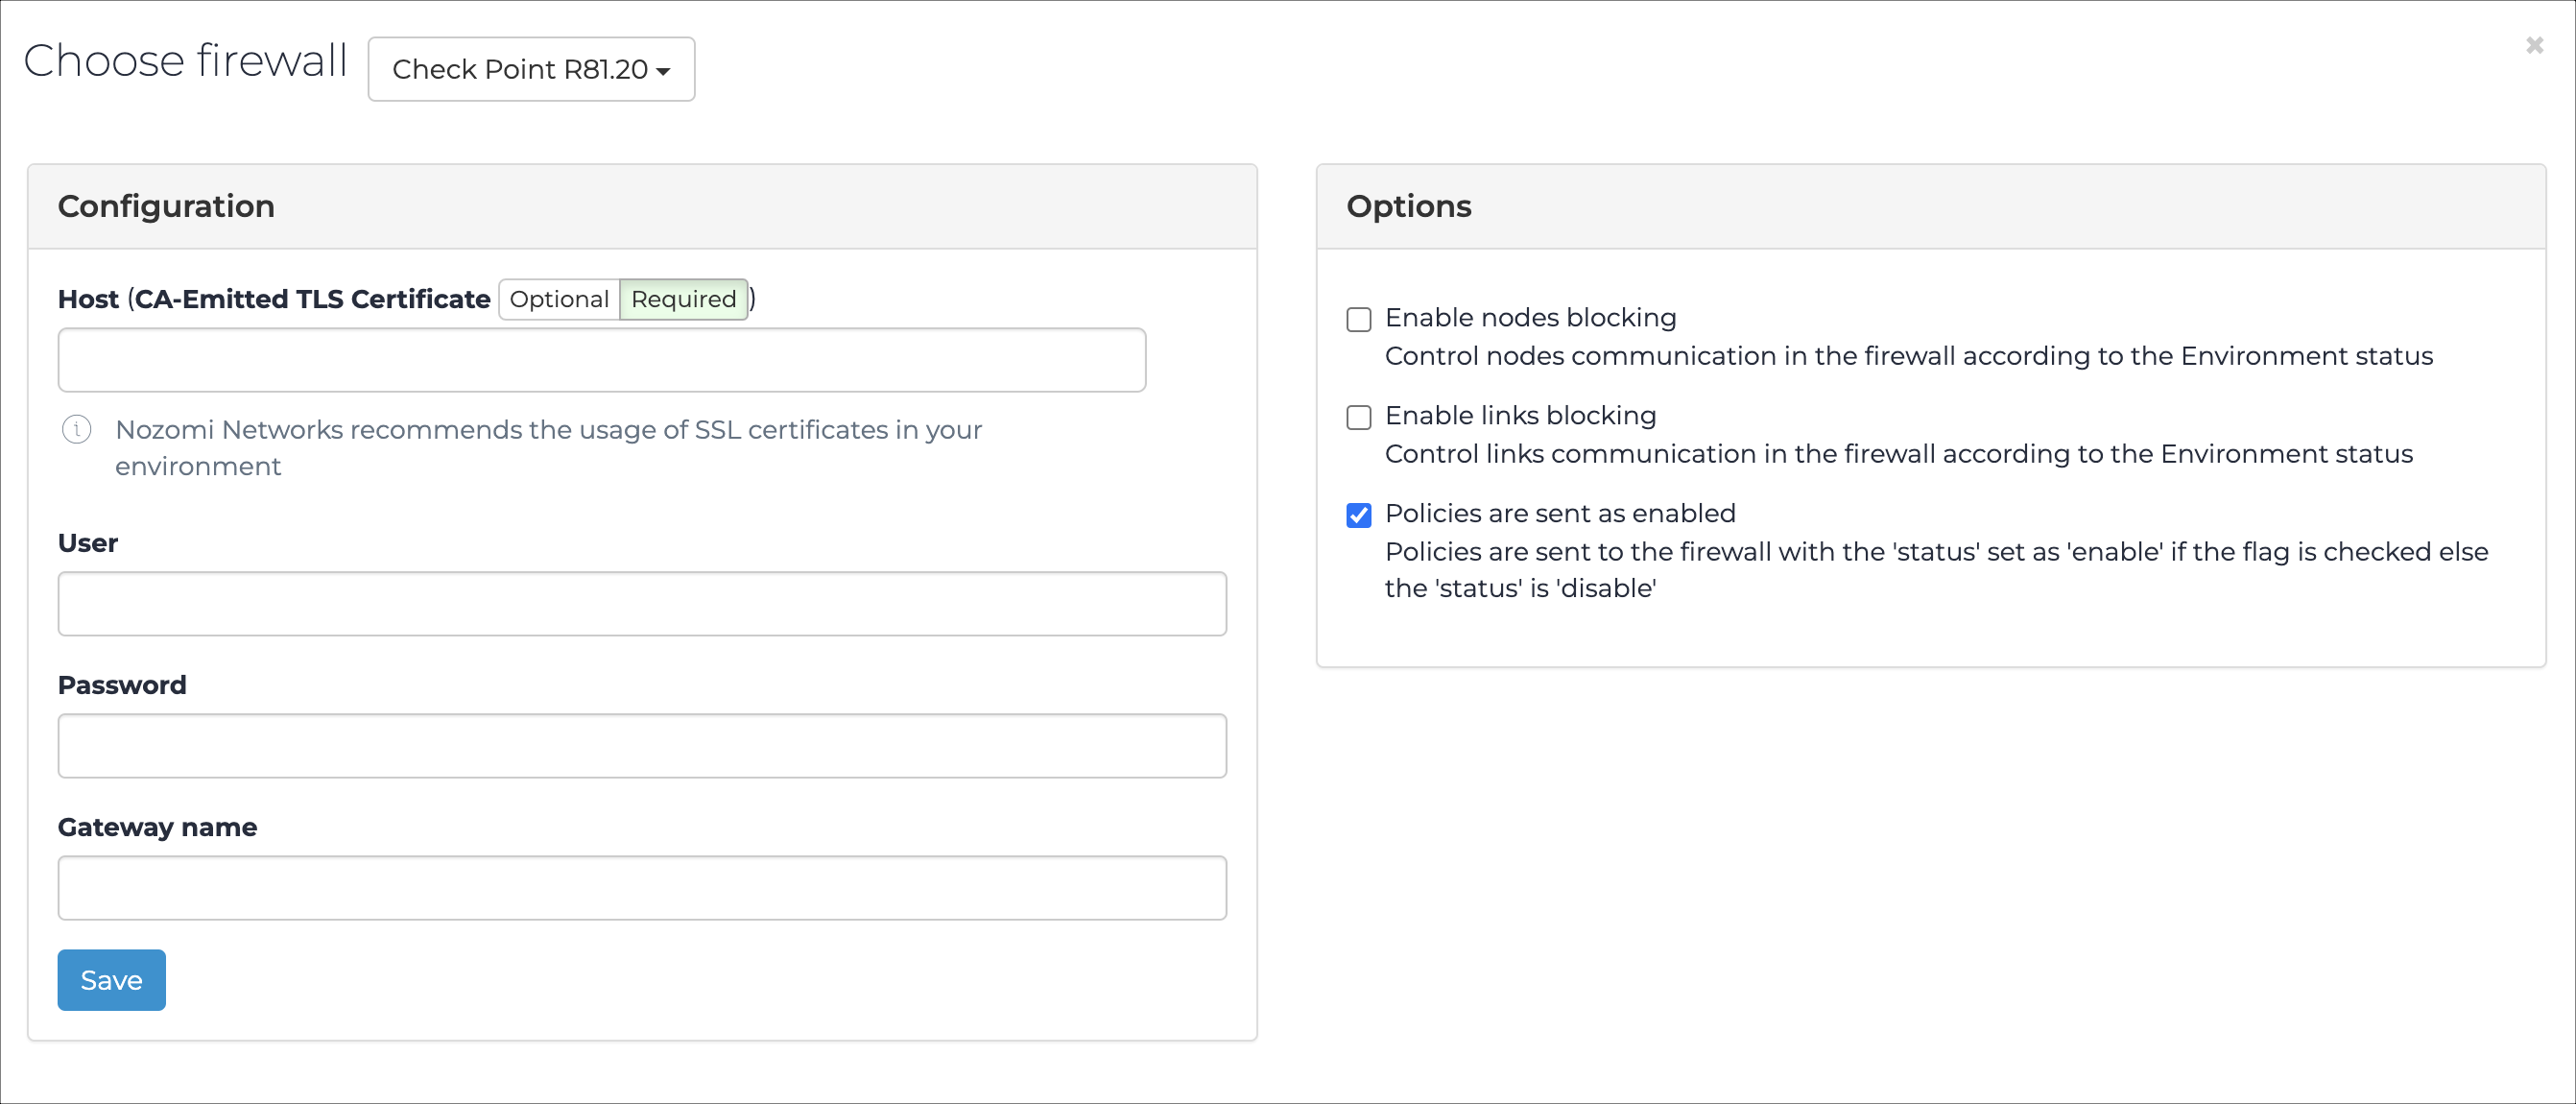
- In the User field, enter your user name.
- In the Password field, enter your password.
- In the Gateway name field, enter a name.
- Optional:
Select Enable nodes
blocking.
Enable this option if you want to block nodes.
- Optional:
Select Enable links
blocking.
Enable this option if you want to block links.
- Optional:
Select Policies are sent as
enabled.
Make sure that this option is selected so that policies are active upon deployment.
- Select Save.