Generate an API key
Before you can use an API key, you must generate one.
- Created a user to associate with your third-party application
- Assigned the user a role that grants the necessary permissions and scope within Vantage
- Log into Vantage as the user who will own the API key.
-
In the top navigation bar, select
 > Profile.
-
Select API Keys.
The API Keys page opens.
-
In the Description field, enter a description for the
API key.
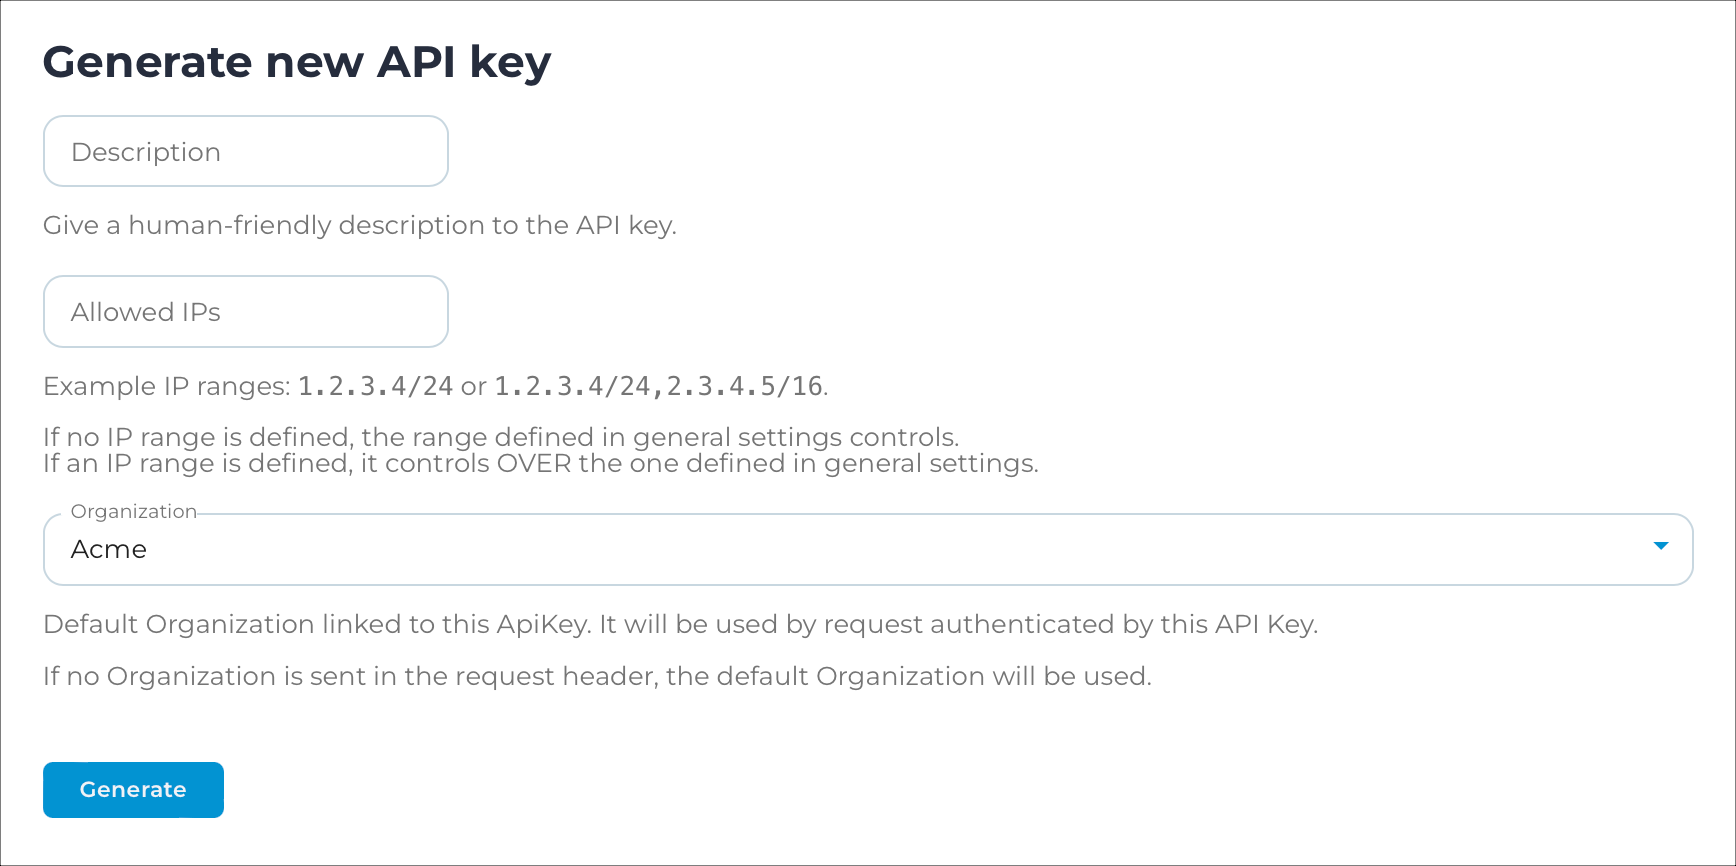
Note: Nozomi Networks recommends that the description includes the name of the application that will connect with the API key. - Optional:
Enter a range of allowed internet protocol (IP) addresses in the
Allowed IPs field. Only applications within this
range will be permitted to connect with this key.
Note: For these settings, you must use comma-delimited entries, in classless inter-domain routing (CIDR) format. Values here will override the values in the SECURITY section on the General page.
-
In the Organization field, select the organization that
will be the default for this API key.
Note: If an API request that uses this key doesn't include an organization, the default organization is used.
-
Select Generate.
Vantage generates a key and displays its:
- Key name
- Key token
- Allowed ips
- Linked organization
-
Important: You will need some of these values when you configure your third-party application. While the name is shown in the Vantage user interface (UI) after this point, the token is not shown again. If you lose this data, you must generate a new API key.Record these details:
- Key name
- Key token
- Allowed ips