Local UI
The default method to manage Arc is through the upstream Nozomi Networks product, which applies configurations to all Arc sensors in Service mode. However, it is also possible to manage Arc through a local UI for One-shot and Offline executions.
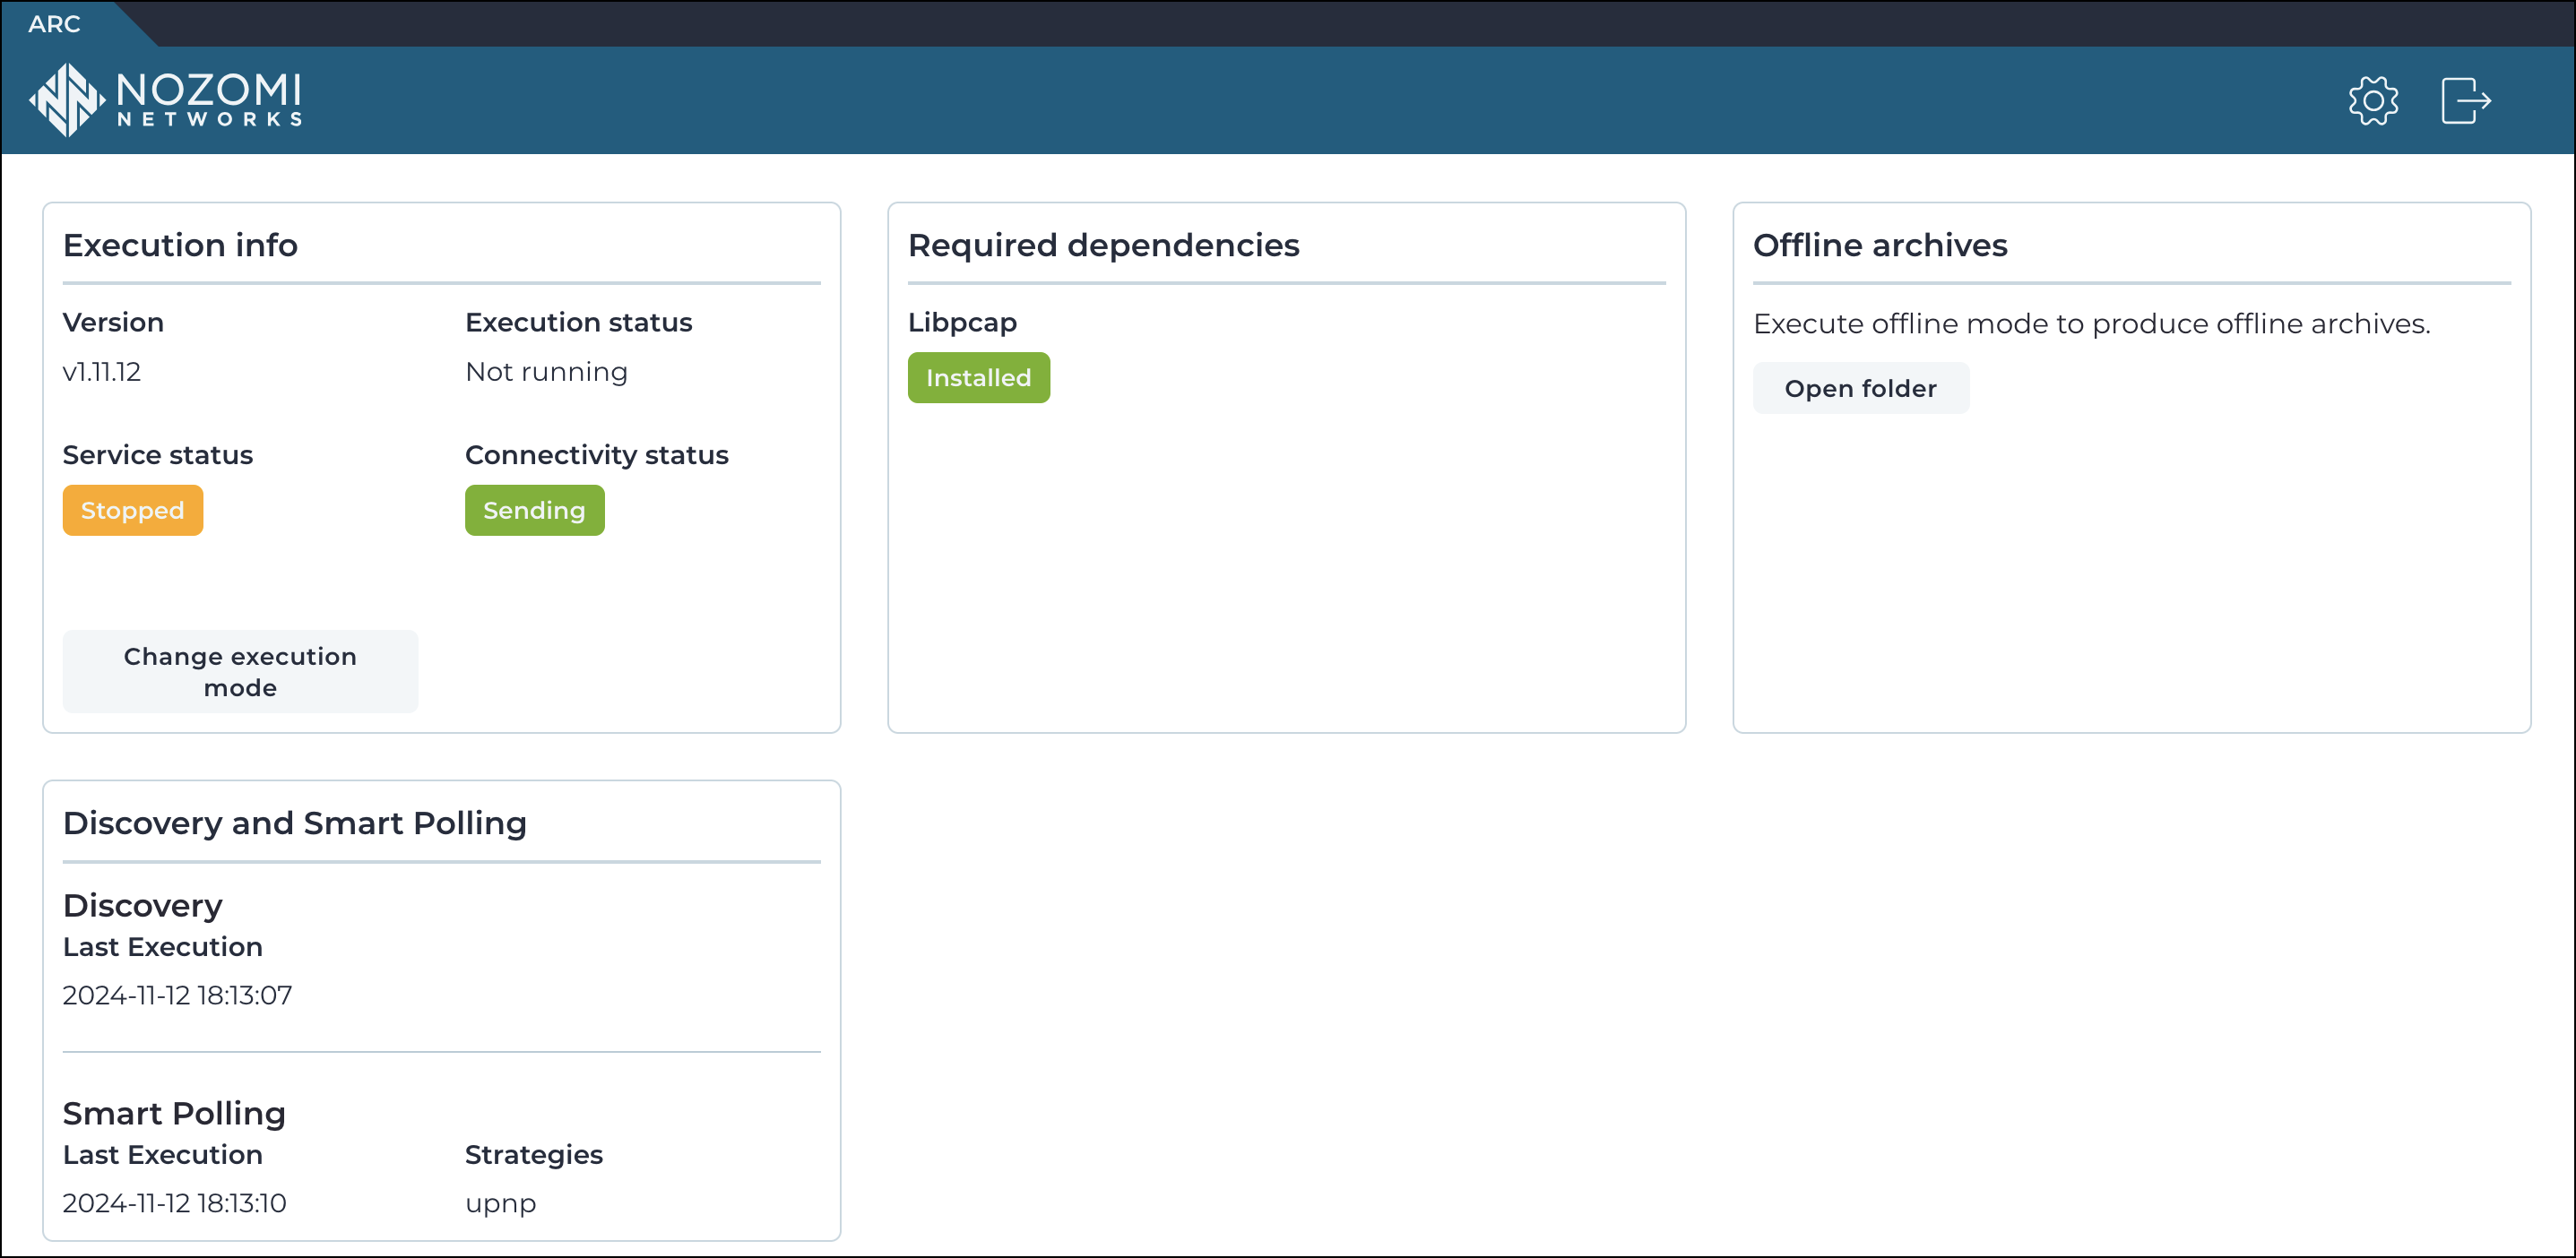
The local user interface (UI) has these sections:
Version: This shows the version of Arc that has been deployed.
Sensor ID: This shows the identifier (ID) of the sensor.
Start button: This lets you choose and control a mode. You can choose between:
- Start (in Service mode)
- Start in One-shot mode
- Start in Offline mode
For more details, see Execution modes.
To access the Offline archives page, you can select the
![]() Archives icon.
Archives icon.
To access the Configuration page, you can
select the ![]() icon.
icon.
To log out, you can select the ![]() icon.
icon.
- Guardian
- CMC, or
- Vantage
- Check the status of Arc locally
- Change the settings after Arc has been downloaded
- Run it locally during a manual deployment
- Double-click the executable file, or
- From a shell, invoke it from a terminal without a parameter, with a command like
.\arc-windows-amd64.exe
When you do this, Arc will open a page in your default browser at the address
http://127.0.0.1:4510
- That the browser will only open when a default browser is installed and configured
- That the double-click action will only work if the application is recognized as an executable. For Linux and macOS, this means that it needs to be associated to the Terminal (shell) application
- For Ubuntu distribution, you can only open the browser when the package
xdg-utilsis installed - For Linux, the root user cannot open a browser, so you must not open the local UI as root
- If the browser does not open for one of the reasons listed above, you can open the browser and page manually