Add LDAP users
You can add existing lightweight directory access protocol (LDAP) users for login. LDAP permissions are defined based on the user group.
Before you begin
- The domain name (i.e., pre-Windows 2000 name), referred to as
<domainname> - The domain distinguished name, referred to as
<domainDN> - One or more domain controller internet protocol (IP) addresses,
referred to as
<domaincontrollerip>
About this task
The supported lightweight directory access protocol (LDAP) formats are:
- v2
- v3
Procedure
-
In the top navigation bar, select
 The administration page opens.
 -
In the Settings section, select
Users.
The Users management page opens.
-
In the top right section, select LDAP.
The LDAP page opens.
-
In the top right section, select +Add.
A dialog shows.
-
In the Username field, enter a username.
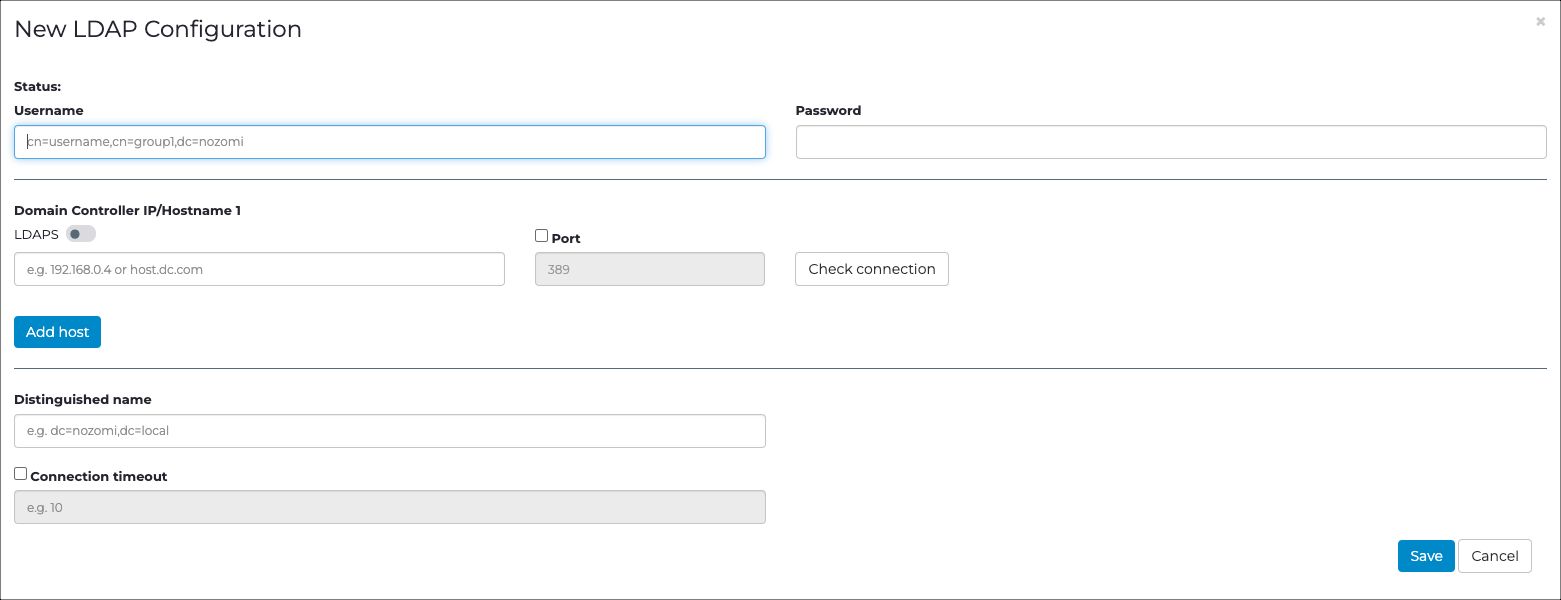
- In the Password field, enter a password.
-
In the Domain Controller IP/Hostname 1 section:
- To use LDAP, leave the LDAPS toggle unselected
- To use lightweight directory access protocol secure (LDAPS), select the LDAPS toggle to on.
- Optional:
If necessary, and you chose LDAPS, select
Verify SSL.
Note:By default, the server's secure sockets layer (SSL) certificate is not verified.
- If you chose LDAP, in the Port field, enter a 389. If you chose LDAPS, in the Port field, enter 636.
- To check that Active Directory is running correctly on the port, select Check connection.
- To add another domain controller IP address, select Add host.
- In the Distinguished name field, enter a value.
- Optional: If necessary, select Connection timeout, and enter a value in seconds.
-
To save the changes and validate the data, select
Save.
Note:If there are errors, they will show next to the Status field.