Create the log source
Learn how to set up a Nozomi Networks universal log source in QRadar. This covers navigation, selection, and configuration of log source parameters, including type, name, and unique identifiers, sourced from the IBM QRadar GitHub repository.
Procedure
- Open QRadar.
- Select .
-
In the Apps section, select QRadar Log Source
Management.
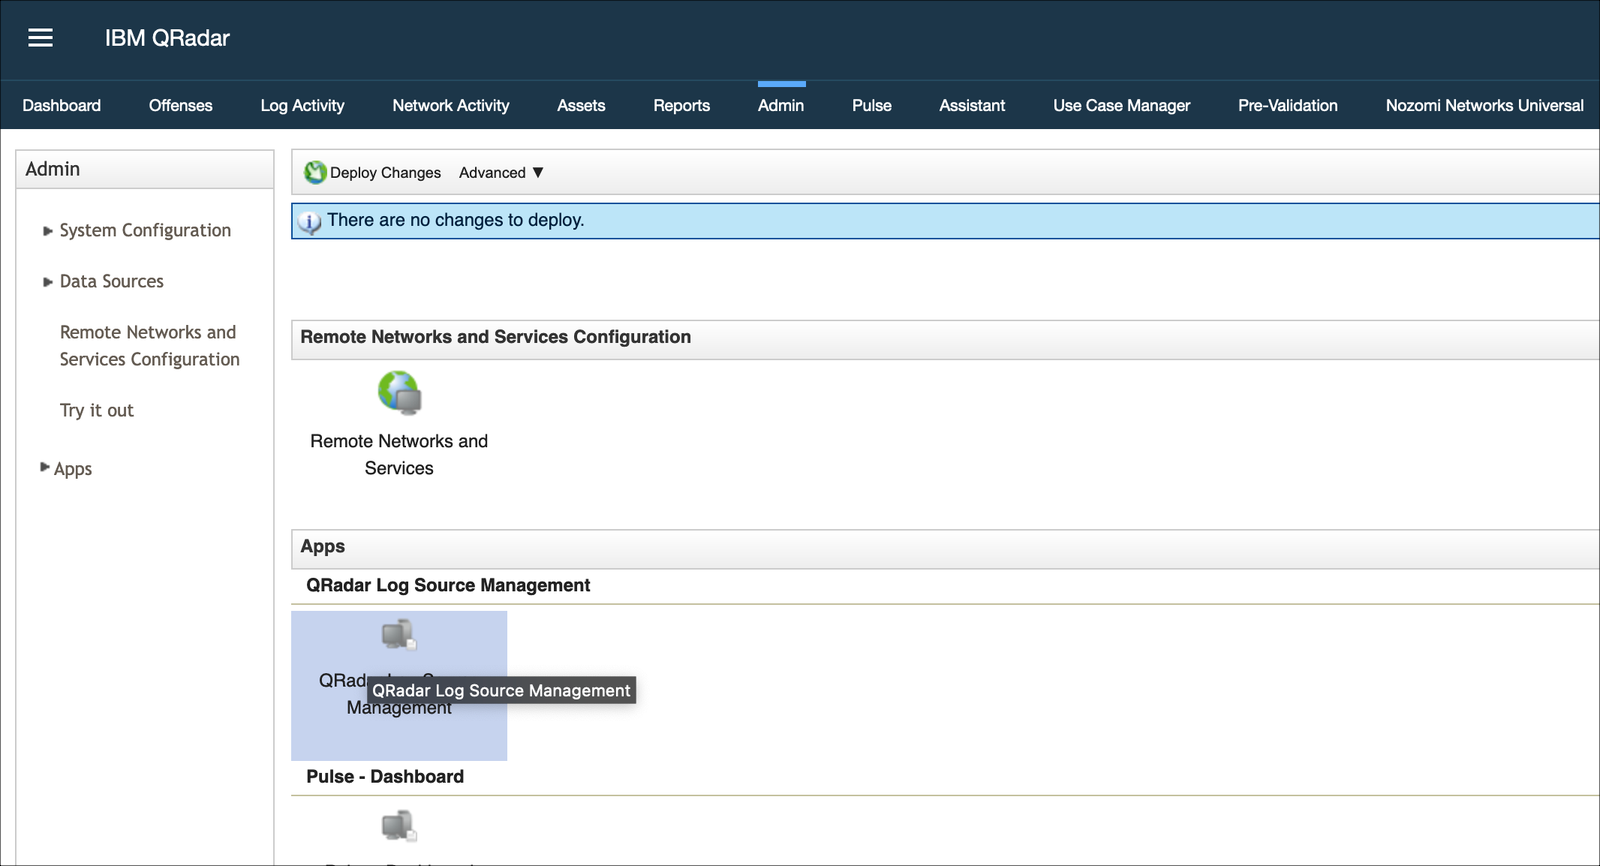
- In the pane on the left, select Select Log Source Type.
-
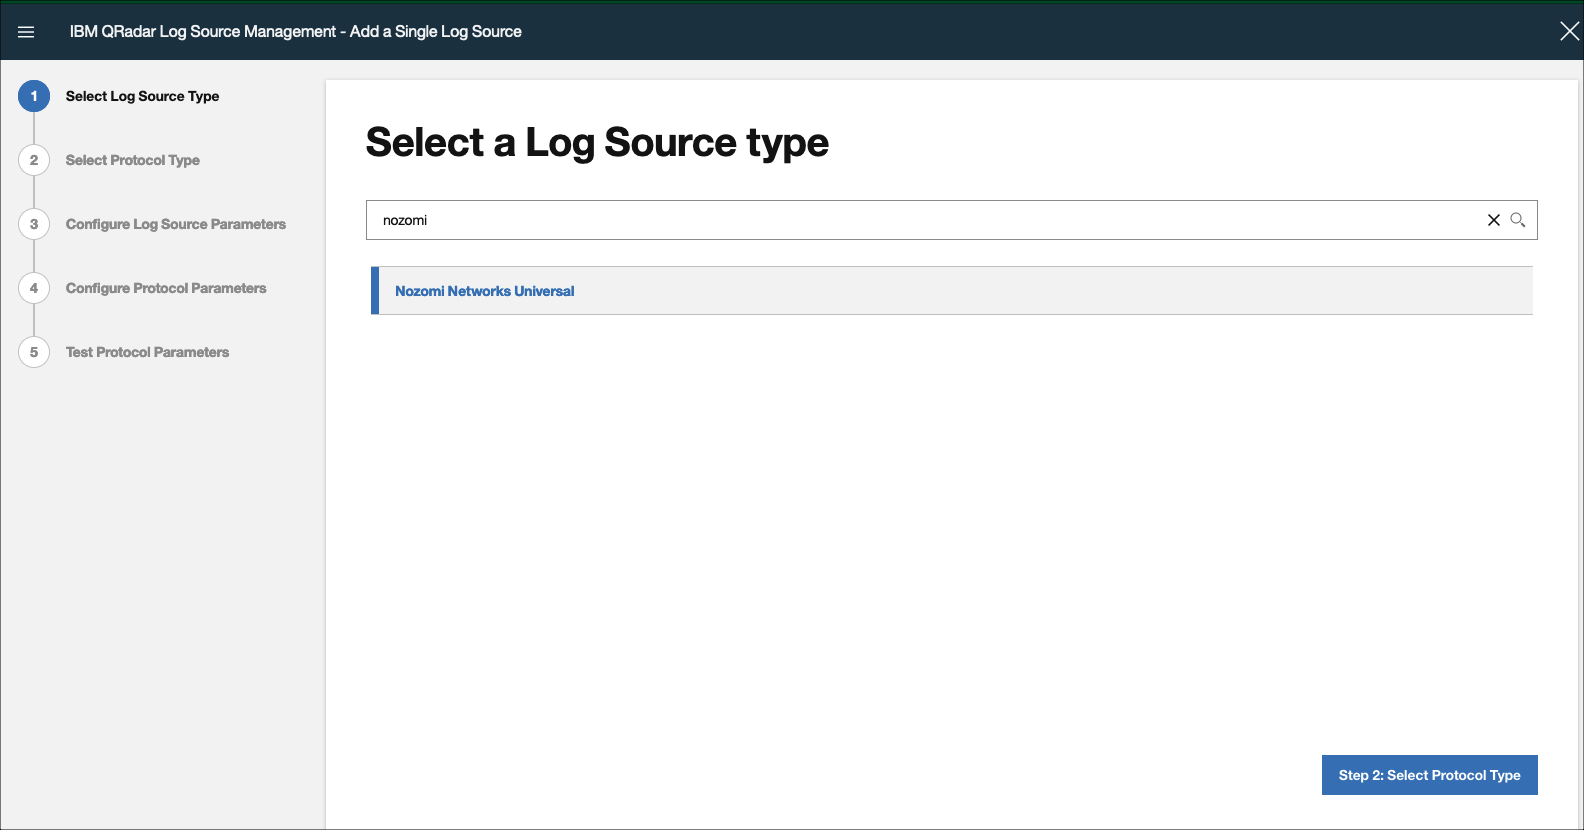
In the search field, search for and then select: Nozomi Networks
Universal.
-
In the bottom right corner, select Step 2: Select Protocol
Type.
The Select a protocol type page opens.
-
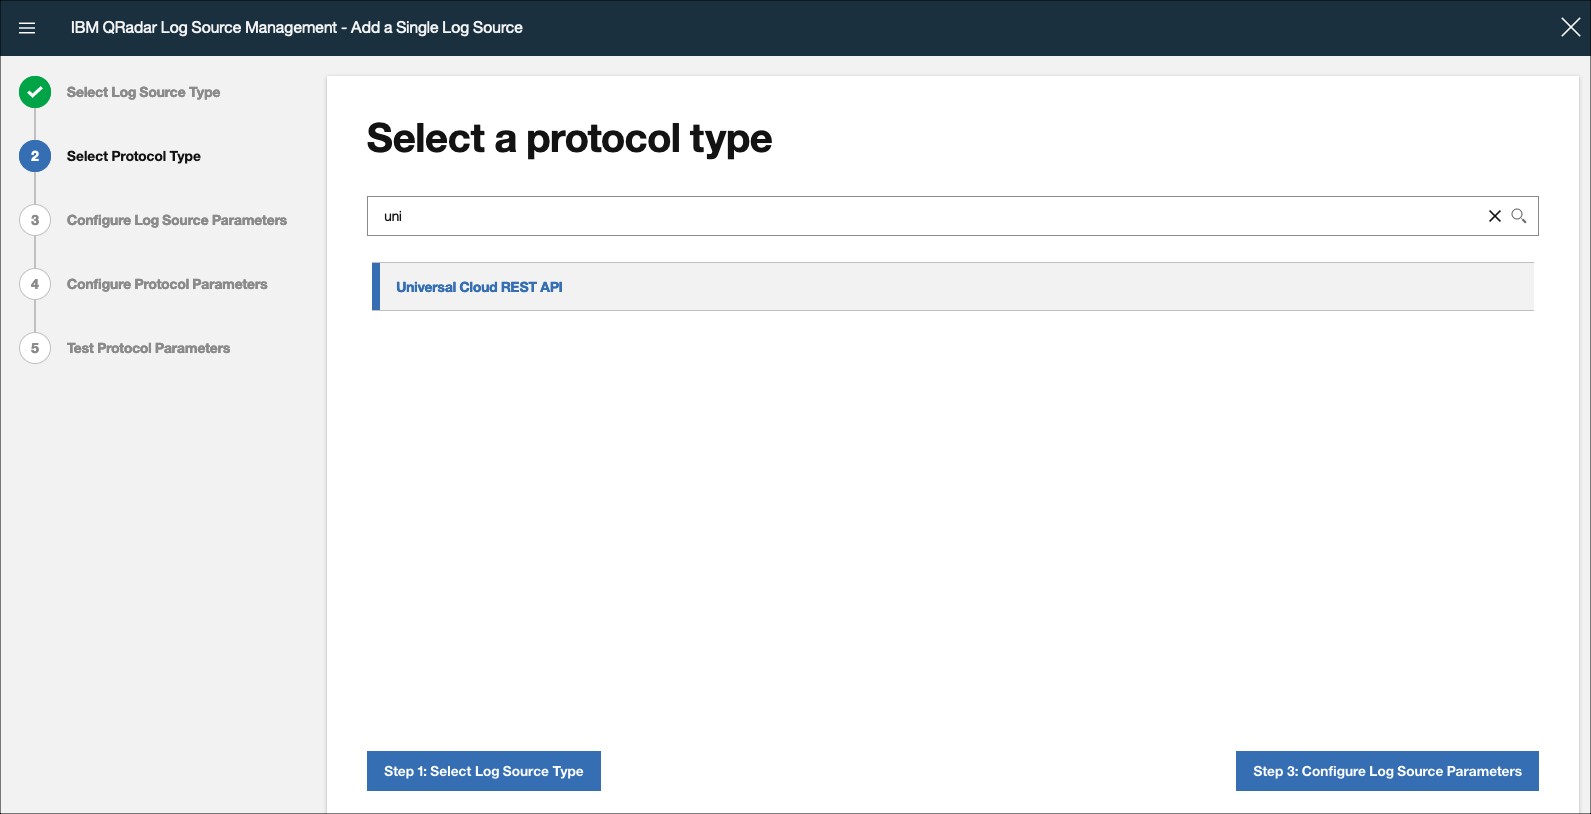
In the search field, search for and then select: Universal Cloud
REST API.
-
In the bottom right corner, select Step 3: Configure Log Source
Parameters.
The Configure the Log Source parameters page opens.
-
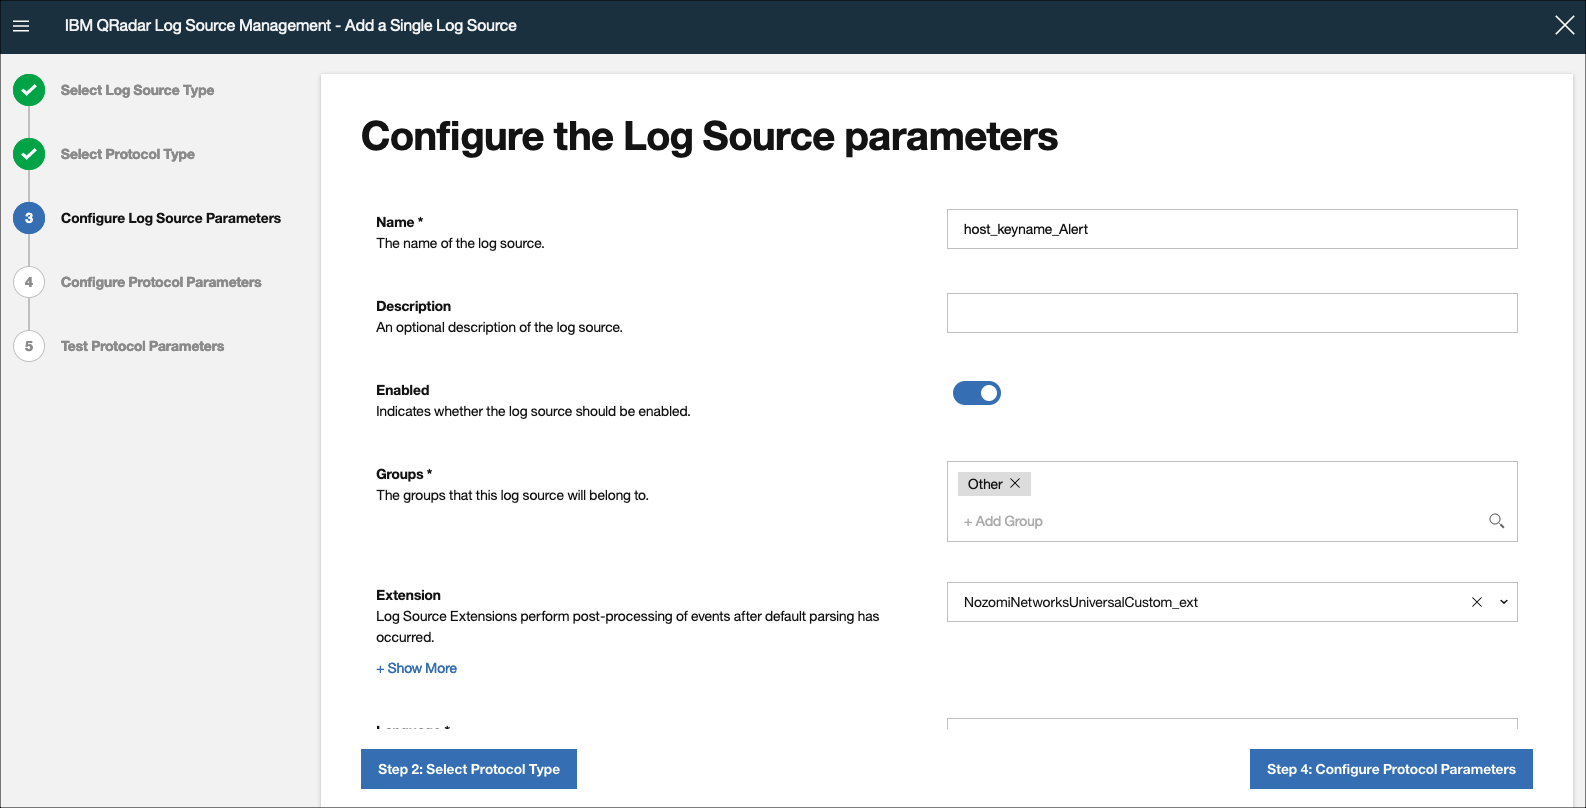
In the Name field, enter the name of the log source.
-
In the Extension field, enter:
NozomiNetworksUniversalCustom_ext
Note:If you do not add the extension, the QRadar system will automatically assign it.
-
In the bottom right corner, select Step 4: Configure Protocol
Parameters.
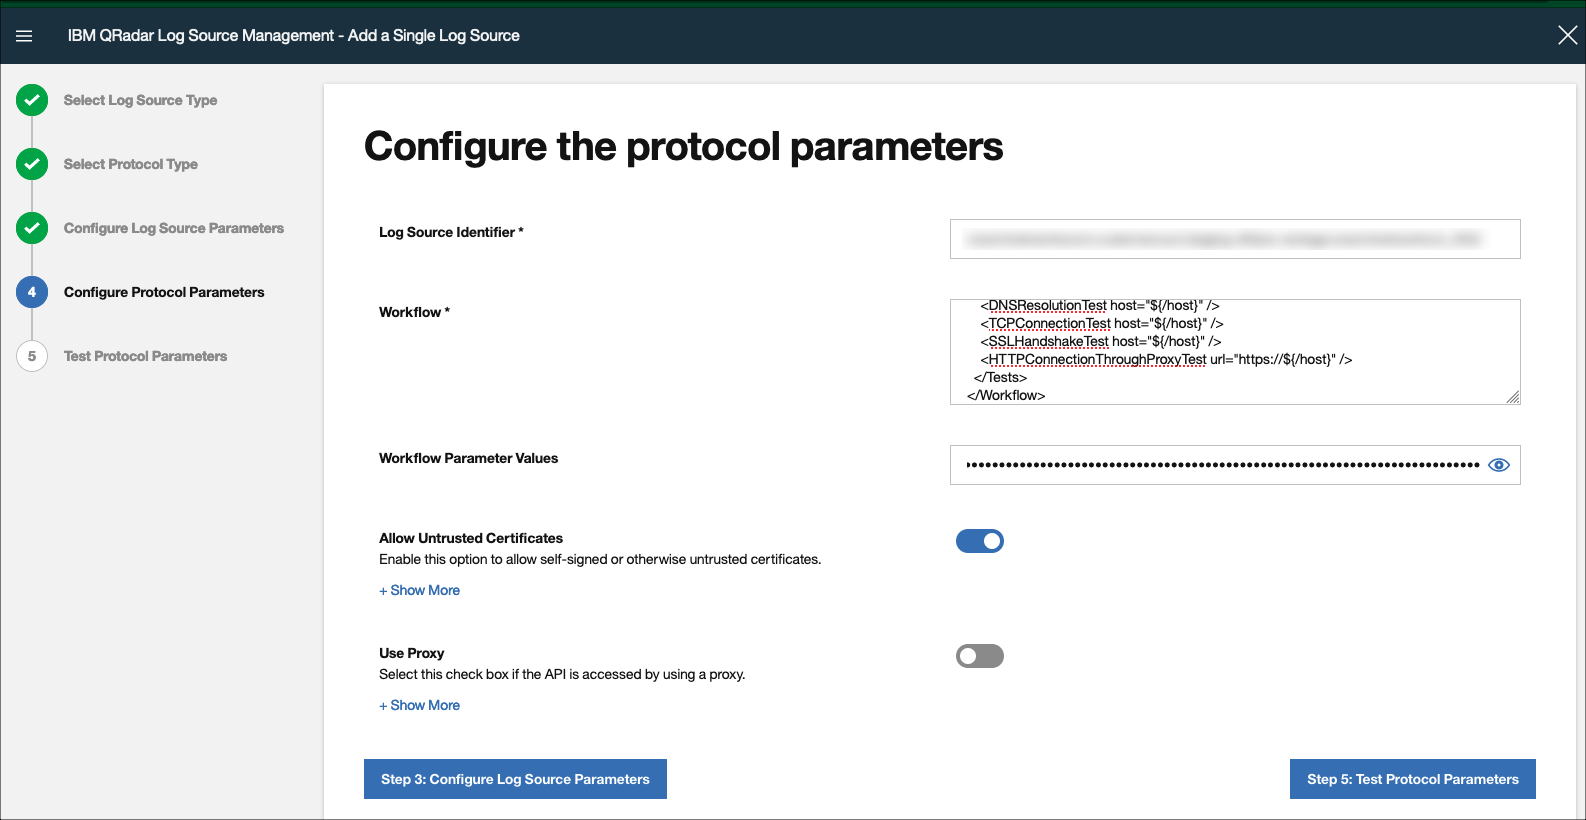
The Configure the protocol parameters page opens. -
In the Log Source Identifier field, enter an identifier.
Concatenate the Nozomi Networks endpoint with the
key_name, followed by eitherAlertorAssetstring:nozominetworkscom.customers.eu1.io_AKdf6123_AlertThe Log Source Identifier should be unique and should be similar to:${/host}_${/key_name}_Alert ${/host}_${/key_name}_Assethostis the Vantage endpoint like:nozominetworkscom.customers.eu1.xxx.nozominetworks.iokey_nameis the key_name generated in Vantage._Assetand_Alertare just strings.LogSourceIdentifierexamples:nozominetworkscom.customers.eu1.xxx.nozominetworks.io_AK023XXX_Alertnozominetworkscom.customers.eu1.xxx.nozominetworks.io_AK023XXX_Asset
-
In the Workflow field, enter the value.
You can get the latest version from the IBM QRadar GitHub repository.Note:There are two types of workflow: Alerts and Assets.
-
In the Workflow Parameter Values field, enter the
value.
You can get the latest version from the IBM QRadar GitHub repository.Note:In the Workflow Parameter Values field you must add:
hostkey_namekey_token
<?xml version="1.0" encoding="UTF-8" ?> <WorkflowParameterValues xmlns="http://qradar.ibm.com/UniversalCloudRESTAPI/WorkflowParameterValues/V1"> <Value name="host" value="nozominetworkscom.customers.vantage.nozominetworks.io" /> <Value name="key_name" value="AK023xxx" /> <Value name="key_token" value="fha0ef3b5f1a36Y9c30e352562e429eexxxxx" /> </WorkflowParameterValues> -
In the bottom right corner, select Step 5: Test Protocol
Parameters.
The Test Protocol Parameters page opens.
-
To make sure that the parameters of the log source configuration are correct,
select Start Test.
Figure 1. Test protocol parameters page 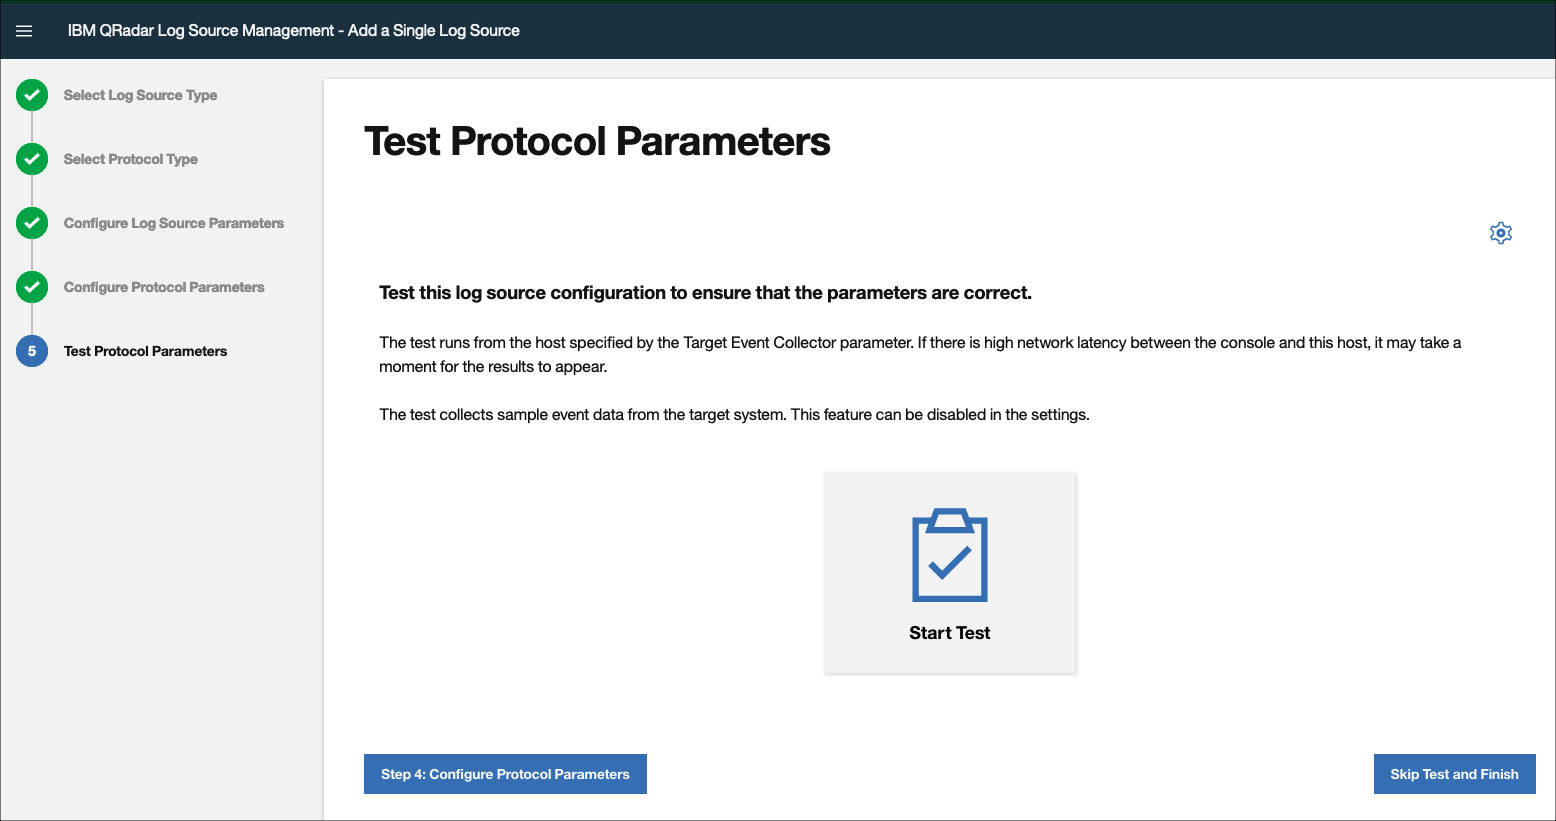
-
If the configuration is correct, a positive result will show.
Figure 2. Successful result 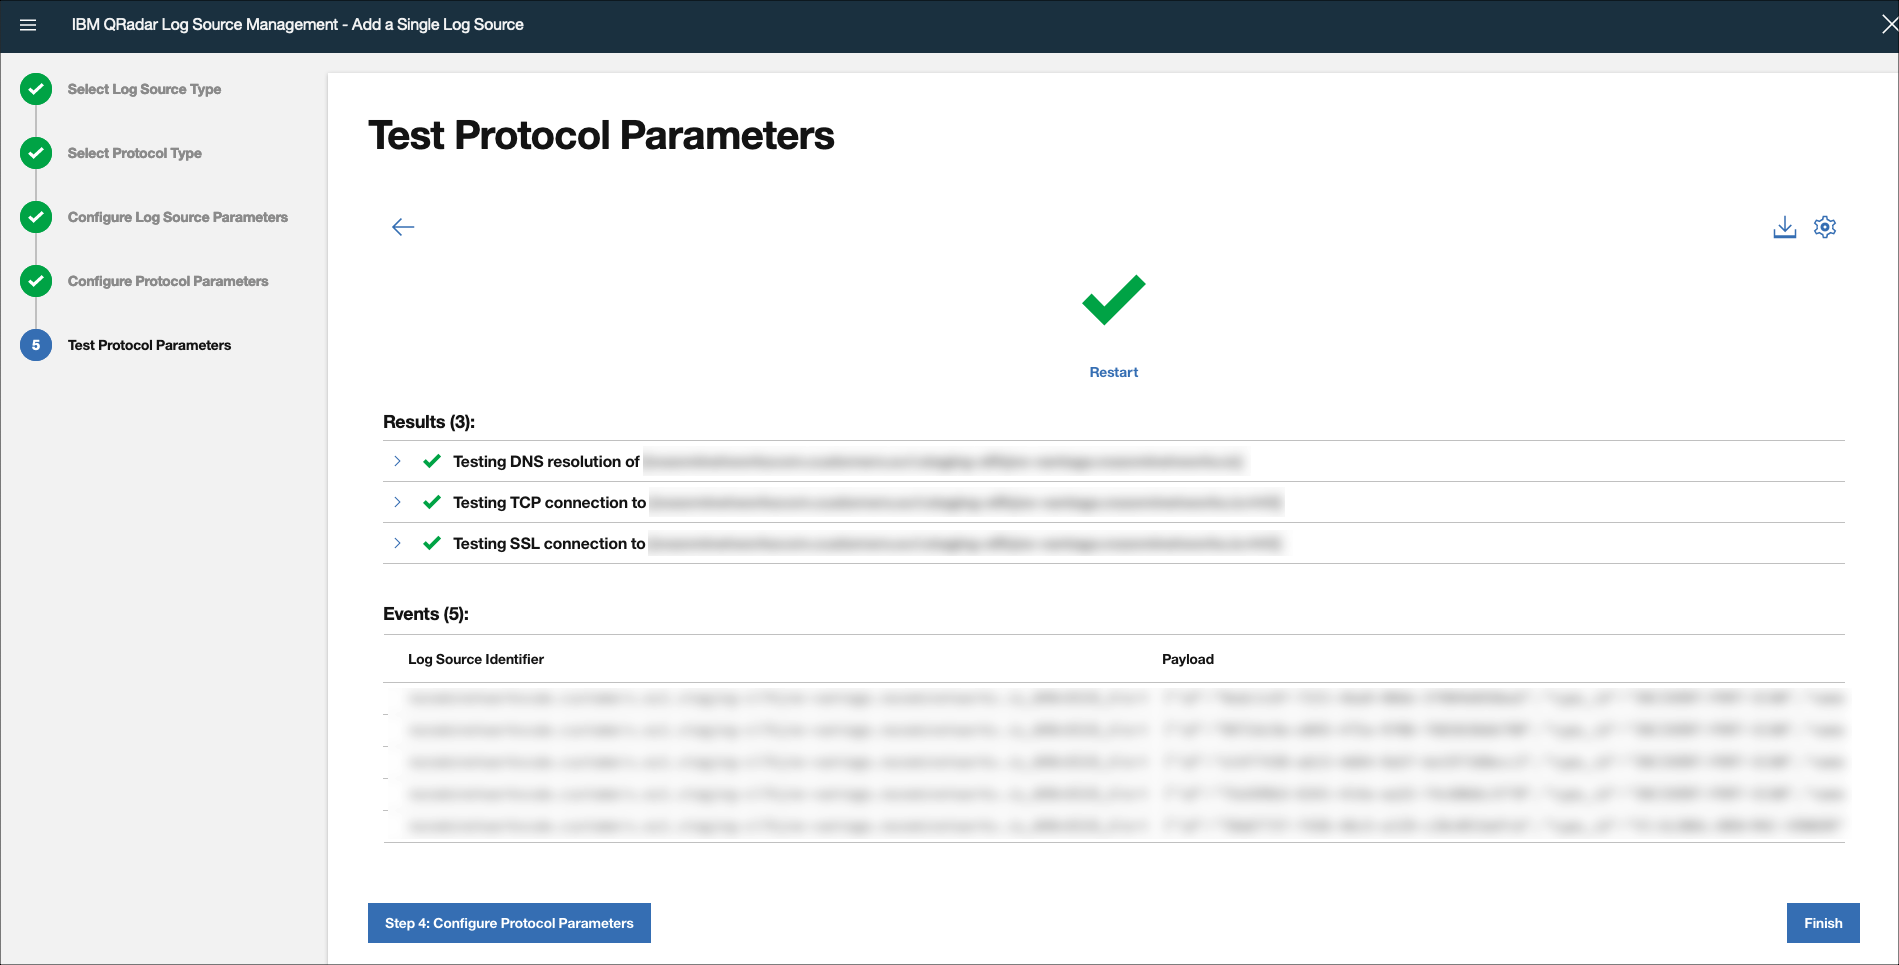
-
If the configuration is not correct, a negative result will show.
Figure 3. Unsuccessful result 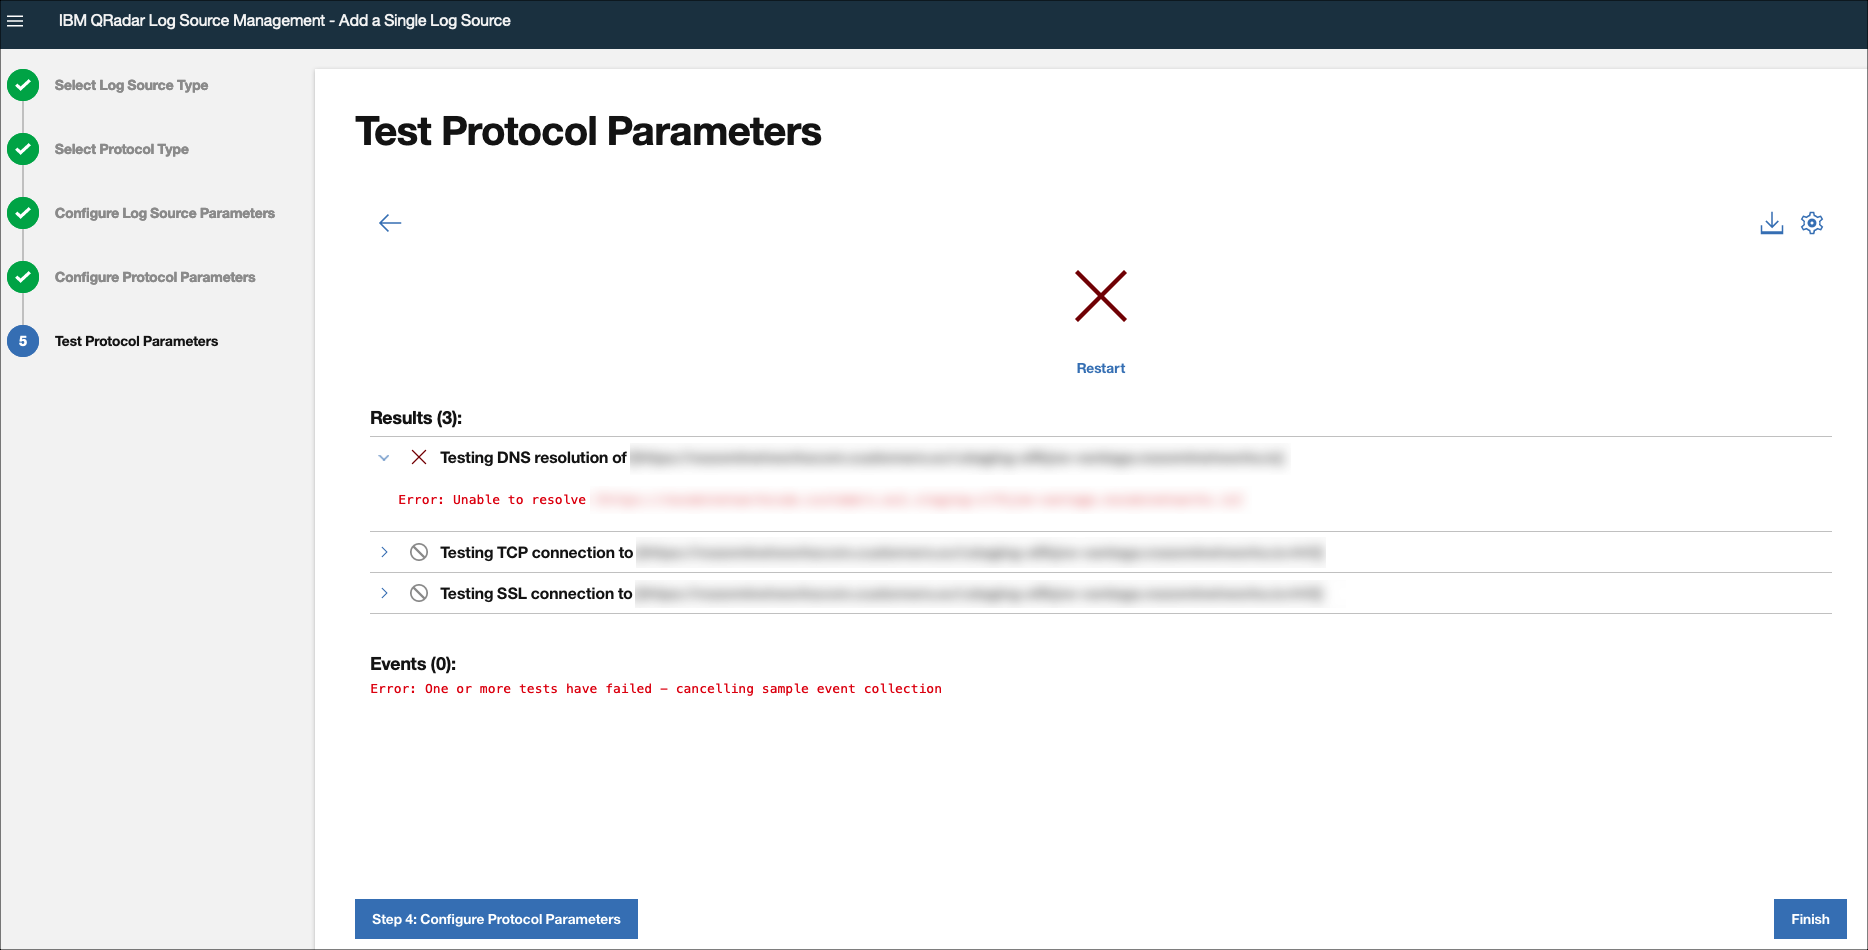
-
If there is an authentication error, the Error 401 page
will show.
This might be because the
key_nameand/or thekey_tokenare not valid (incorrect or expired).Figure 4. Error 401 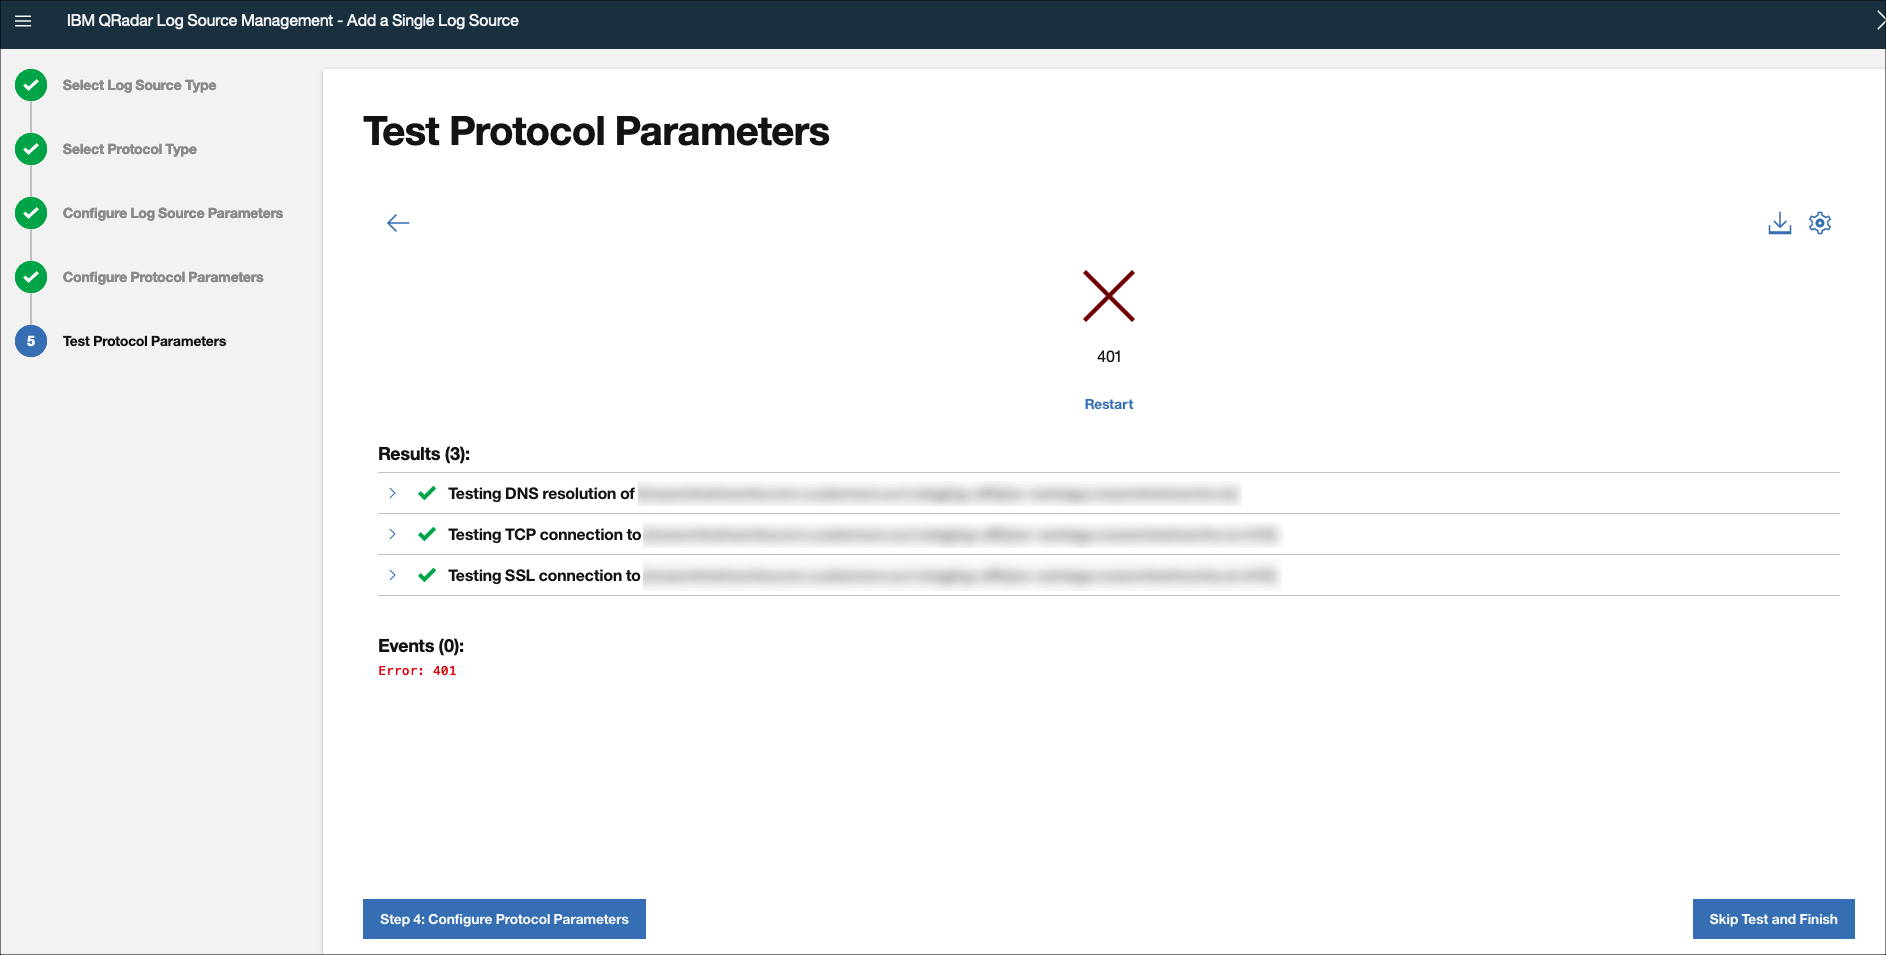
- Select Finish.